Sunday, November 27, 2016

Christmas Cards

ChristmasCards wesens-art.blogspot.com
Here is a tutorial for Christmas Cards, made by my 5 years old granddaughter! 
What you need: 
paper for the cards 
wool 
needle 
beads 
scissors 
glue stick 
Hier ist eine Anleitung für Weihnachtskarten, gemacht von meiner 5-jährigen Enkelin! 
Was man braucht: 
Papier für die Karten 
Wolle 
Nadel 
Perlen 
Schere 
Klebestift 
ChristmasCards 1 wesens-art.blogspot.com
Cut out a fir and a star and 2 cards. 
Eine Tanne und einen Stern und 2 Karten ausschneiden. 
ChristmasCards 2 wesens-art.blogspot.com
Glue the fir and the star on the cards. 
Tanne und Stern auf die Karten kleben. 
ChristmasCards 3 wesens-art.blogspot.com
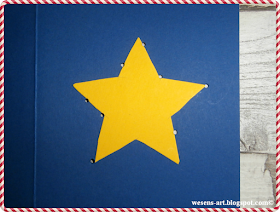
Pierce a few holes with a big needle beside the edges. 
Mit einer dicken Nadel einige Löcher neben die Ränder stechen. 
ChristmasCards 4 wesens-art.blogspot.com
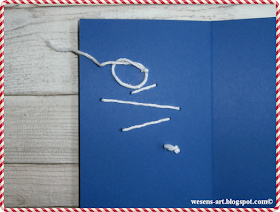
Thread the wool into the needle and make a few knots at the end of the wool. 
Die Wolle in die Nadel fädeln, und am Ende der Wolle mehrere Knoten machen.
ChristmasCards 5 wesens-art.blogspot.com
Pull the needle through one of the holes, begin at the inside of the card. And pull some beads on the wool before you pull the needle through the next hole.
Die Nadel durch eines der Löcher stechen, auf der Innenseite der Karte beginnend. Und einige Perlen aufziehen, bevor die Nadel durch das nächste Loch gestochen wird. 
ChristmasCards 6 wesens-art.blogspot.com
ChristmasCards 7 wesens-art.blogspot.com
Make a few knots at the end of the wool on the inside of the card. 
Auf der Innenseite der Karte einige Knoten ans Ende der Wolle machen. 
ChristmasCards 8 wesens-art.blogspot.com
And it's done! 
Fertig! 
ChristmasCards 9 wesens-art.blogspot.com

Visit and like me on Facebook!


Attention! It is not allowed to copy or use my posts, photos, pattern, templates or files for business or selling!!!
Wichtig! Es ist untersagt, meine Beiträge, Fotos, Schnittmuster, Vorlagen oder Dateien zu kopieren oder gewerblich oder zum Verkauf zu nutzen!!! 
I’m sharing my projects with these fabulous linky parties: look here!
...

Sunday, November 20, 2016

Muffin Pan Advent Calendar

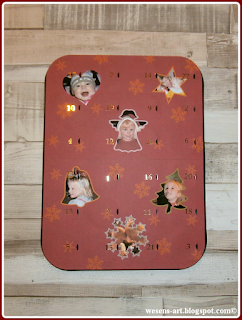
Make a personally Advent Calendar with a mini muffin pan! 
What you need: 
mini muffin pan (24 cup) 
2 sheets paper (160 gsm) 
printer 
scotch tape 
glue stick 
numbers 
sweets or something else for filling 
Mach einen persönlichen Adventskalender aus einem mini Muffinblech! 
Was man braucht: 
mini Muffinblech (24er) 
2 Blatt Papier (160 g) 
Drucker 
Klebefilm 
Klebestift 
Nummern 
Süßigkeiten oder irgendwas zum Füllen 
AdventCalendar 01 wesens-art.blogspot.com
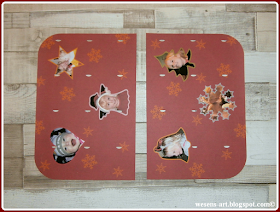
Print this templates on A4 paper (use an image processing program to fill the white shapes with our photos)
(click to the images to enlarge and safe)
Diese Vorlagen auf Din A4 ausdrucken (ein Bildbearbeitungsprogramm zum Einfügen eigener Fotos in die weißen Formen nutzen)
(auf Bilder klicken zum Vergrößern und speichern)
AdventCalendar 2a wesens-art.blogspot.com
AdventCalendar 2b wesens-art.blogspot.com
And print this cutting line on the back side of the paper: 
Und drucke diese Schneidelinien auf die Rückseite des Papiers:

AdventCalendar 2c wesens-art.blogspot.com
Cut it out along the lines. 
Entlang der Linien ausschneiden. 
AdventCalendar 03 wesens-art.blogspot.com
Glue the 2 parts together with scotch tape. 
Die beiden Teile mit Klebefilm zusammenkleben. 
AdventCalendar 04 wesens-art.blogspot.com
Fill the muffin pan. 
Das Blech füllen.
AdventCalendar 05 wesens-art.blogspot.com
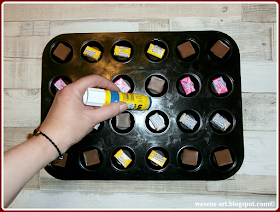
Apply glue stick to all edges. 
Klebestift auf alle Ränder geben. 
AdventCalendar 06 wesens-art.blogspot.com
Place the paper on the pan and press it on. 
Das Papier auf das Blech legen und andrücken.
AdventCalendar 07 wesens-art.blogspot.com

AdventCalendar 08 wesens-art.blogspot.com
Place the numbers on the paper. 
Die Zahlen aufkleben. 
AdventCalendar 09 wesens-art.blogspot.com
And it's done! 
Und fertig!
AdventCalendar 10 wesens-art.blogspot.com

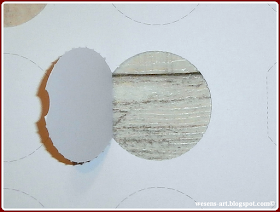
This is an opened door on a neutral sheet of paper: 
Dies ist eine geöffnete Tür auf neutralem Papier: 
AdventCalendar 11 wesens-art.blogspot.com

Visit and like me on Facebook!
Attention! It is not allowed to copy or use my posts, photos, pattern, templates or files for business or selling!!!
Wichtig! Es ist untersagt, meine Beiträge, Fotos, Schnittmuster, Vorlagen oder Dateien zu kopieren oder gewerblich oder zum Verkauf zu nutzen!!!

I’m sharing my projects with these fabulous linky parties: look here!
...

Sunday, November 13, 2016

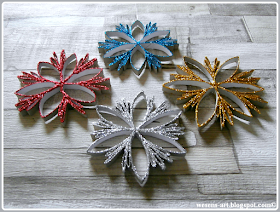
Glitter Ornaments

GlitterOrnaments wesens-art.blogspot.com
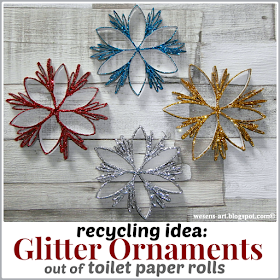
I think this is a great recycling idea for toilet paper rolls! 
And it is much fun for kids to do this! 
Found a video of Innova Manualidades and thought this is a thing my granddaughter would love. 
Ich glaube, dies ist eine großartige Recycling-Idee für Klopapierrollen! Und es macht Kindern so viel Spaß, dies zu machen! 
Ich fand ein Video von Innova Manualidades und dachte, dies ist etwas, was meine Enkelin lieben wird. 

 What you need: 
2 toilet paper rolls 
scissors 
ruler 
pencil 
glue gun 
school glue 
glitter 
Was man braucht: 
2 Klopapierrollen 
Schere 
Lineal 
Bleistift 
Heißklebepistole 
Bastelkleber 
Glitter 
GlitterOrnaments 01 wesens-art.blogspot.com
Press the rolls flat. 
Die Rollen flach drücken.
GlitterOrnaments 02 wesens-art.blogspot.com
Mark every centimeter on both long edges of the roll. 
Jeden Zentimeter an beiden langen Seiten der Rolle markieren. 
GlitterOrnaments 03 wesens-art.blogspot.com
Connect the points. 
Die Punkte verbinden. 
GlitterOrnaments 04 wesens-art.blogspot.com
Cut along the lines. 
Entlang der Linien zerschneiden. 
GlitterOrnaments 05 wesens-art.blogspot.com
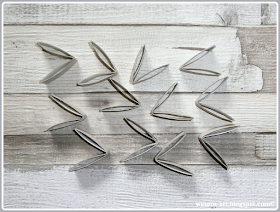
Now you must have 18 of this ovals. 
Nun muss man 18 dieser Ovale haben.
GlitterOrnaments 06 wesens-art.blogspot.com
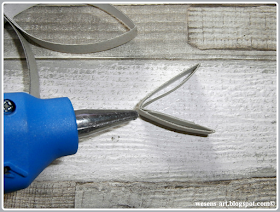
Glue 6 of this ovals at one small edge together with the glue gun (This step is only adults or older kids!)
6 dieser Ovale an einer der schmalen Kanten zusammenkleben. 
(Dieser Schritt ist nur für Erwachsene oder ältere Kinder!) 
GlitterOrnaments 07 wesens-art.blogspot.com
GlitterOrnaments 08 wesens-art.blogspot.com
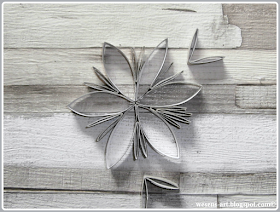
Glue them together, so you get a star. 
Zusammenkleben, dann erhält man einen Stern. 
GlitterOrnaments 09 wesens-art.blogspot.com
Fold the other strips of the rolls in halfs. 
Die anderen Streifen der Rollen in Hälften falten.
GlitterOrnaments 10 wesens-art.blogspot.com
Place a point of glue on the folded edge...
Etwas Kleber auf die gefaltete Kante geben...
GlitterOrnaments 11 wesens-art.blogspot.com
...and put it between 2 of the ovals. 
...und zwischen 2 der Ovale kleben.
GlitterOrnaments 12 wesens-art.blogspot.com
GlitterOrnaments 13 wesens-art.blogspot.com
 And repeat the last step. 
Und den letzten Schritt wiederholen. 
GlitterOrnaments 14 wesens-art.blogspot.com
GlitterOrnaments 15 wesens-art.blogspot.com
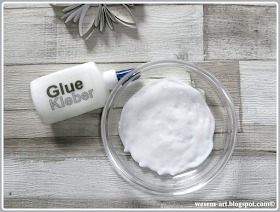
Now fill school glue into a flat bowl. 
Nun Bastelkleber in eine flache Schale geben. 
GlitterOrnaments 16 wesens-art.blogspot.com
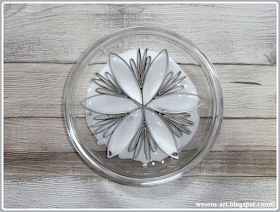
And place the ornament into it. 
Und das Ornament hinein geben. 
GlitterOrnaments 17 wesens-art.blogspot.com
Then give glitter on a sheet of paper and place the ornament on it, with the glue on the bottom side. 
Dann Glitter auf ein Blatt Papier geben und das Ornament hinein, mit dem Kleber auf der Unterseite. 
GlitterOrnaments 18 wesens-art.blogspot.com
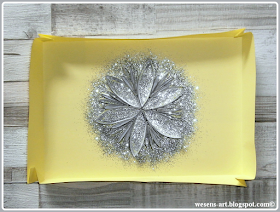
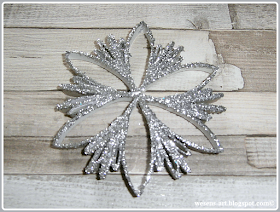
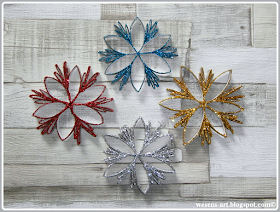
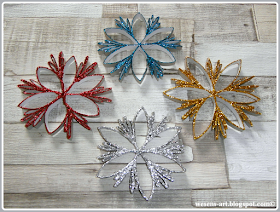
Remove it from the glitter, let it dry and it's done!
Aus dem Glitter nehmen, trocken lassen und fertig!
GlitterOrnaments 20 wesens-art.blogspot.com

GlitterOrnaments 21 wesens-art.blogspot.com
GlitterOrnaments 22 wesens-art.blogspot.com
GlitterOrnaments 23 wesens-art.blogspot.com


Visit and like me on Facebook!


Attention! It is not allowed to copy or use my posts, photos, pattern, templates or files for business or selling!!!
Wichtig! Es ist untersagt, meine Beiträge, Fotos, Schnittmuster, Vorlagen oder Dateien zu kopieren oder gewerblich oder zum Verkauf zu nutzen!!! 
I’m sharing my projects with these fabulous linky parties: look here!
...