Sunday, April 24, 2016

DIY faux leather paper Key Chains

KeyChains wesens-art.blogspot.com
This time I will show you how to make key chains out of faux leather paper. 
Why faux leather paper?
It is washable, durable, ironable, sewable, glueable, stampable... And it is cuttable with scissors, cutting knives or electronic cutting machines! 
And here I will show a tutorial to cut this key chains with the Silhouette Cameo (but this tutorial is also for Silhouette Portrait or Curio). 
What I've used: 
Silhouette Faux Leather Paper 
heat transfer vinyl 
key ring 
school glue 
Diesmal zeige ich, wie man Schlüsselanhänger aus Kunstleder Papier macht. 
Warum Kunstleder Papier? 
Es ist waschbar, strapazierfähig, bügelbar, nähbar, verklebbar, bestempelbar... Und es ist schneidbar mit Schere, Cuttermesser oder Schneideplotter! 
Und hier zeige ich eine Anleitung zum Schneiden dieser Schlüsselanhänger mit dem Silhouette Cameo (aber es geht genauso mit Silhouette Portrait oder Curio). 
Was ich benutzt habe: 
Silhouette Faux Leather Paper (Kunstleder Papier) 
Flexfolie (Bügelfolie) 
Schlüsselring 
Bastelkleber 
KeyChains 01 wesens-art.blogspot.com
I will show 2 photos for every step, one for the english version and one for the german version. 
I werde 2 Fotos zu jedem Schritt zeigen, eins für die englische Version und eins für die deutsche Version.

Step 1 / Schritt 1
KeyChains 02 wesens-art.blogspot.com
KeyChains 03 wesens-art.blogspot.com

Step 2 / Schritt 2
KeyChains 04 wesens-art.blogspot.com
KeyChains 05 wesens-art.blogspot.com
 Step 3 / Schritt 3
KeyChains 06 wesens-art.blogspot.com
 KeyChains 07 wesens-art.blogspot.com

 Step 4 / Schritt 4
KeyChains 08 wesens-art.blogspot.com
 KeyChains 09 wesens-art.blogspot.com

 Step 5 / Schritt 5 
KeyChains 10 wesens-art.blogspot.com
 KeyChains 11 wesens-art.blogspot.com
Step 6 / Schritt 6
KeyChains 12 wesens-art.blogspot.com
KeyChains 13 wesens-art.blogspot.com

Step 7 / Schritt 7
KeyChains 14 wesens-art.blogspot.com
 KeyChains 15 wesens-art.blogspot.com
Step 8 / Schritt 8 
KeyChains 16 wesens-art.blogspot.com
 KeyChains 17 wesens-art.blogspot.com
 Step 9 / Schritt 9 
KeyChains 18 wesens-art.blogspot.com
KeyChains 19 wesens-art.blogspot.com
Step 10 / Schritt 10 
KeyChains 20 wesens-art.blogspot.com
KeyChains 21 wesens-art.blogspot.com
 Step 11 / Schritt 11 
KeyChains 23 wesens-art.blogspot.com
 KeyChains 23 wesens-art.blogspot.com
 Step 12 / Schritt 12 
KeyChains 24 wesens-art.blogspot.com
KeyChains 25 wesens-art.blogspot.com
Step 13 / Schritt 13 
KeyChains 26 wesens-art.blogspot.com
KeyChains 27 wesens-art.blogspot.com
 Step 14 / Schritt 14 
KeyChains 28 wesens-art.blogspot.com
KeyChains 29 wesens-art.blogspot.com
Step 15 / Schritt 15 
KeyChains 30 wesens-art.blogspot.com
Step 16 / Schritt 16 
KeyChains 32 wesens-art.blogspot.com
KeyChains 33 wesens-art.blogspot.com
This are the results: 
Dies sind die Ergebnisse: 
KeyChains 34 wesens-art.blogspot.com
Press the heat transfer vinyl with the iron to the faux leather paper. 
Die Flexfolie auf das Kunstleder Papier mit dem Bügeleisen aufpressen.
KeyChains 35 wesens-art.blogspot.com
 Apply glue on one part of the backside of the design 
(no glue on the connection part). 
Kleber auf einen Teil der Rückseite des Motivs aufragen 
(kein Kleber auf das Verbindungteil)
Fold the two sides exactly one on another and let the glue dry. 
Beide Seiten genau aufeinander kleben und trocknen lassen. 
KeyChains 37 wesens-art.blogspot.com
Attach the key ring and it's done!
Den Schlüsselring anbringen, fertig!
KeyChains 38 wesens-art.blogspot.com

Heat transfer vinyl on black faux leather paper: 
Flexfolie auf schwarzem Kunstleder Papier:
KeyChains 39 wesens-art.blogspot.com
Flocked heat transfer vinyl on black faux leather paper: 
Flockfolie auf schwarzem Kunstleder Papier: 
KeyChains 40 wesens-art.blogspot.com
White faux leather paper with my own stamp and edited with clear embossing powder: 
Weißes Kunstleder Papier mit meinem Stempel bestempelt und mit klarem Embossingpuder bearbeitet:
KeyChains 41 wesens-art.blogspot.com
And now one of the design I love so much - the cute little sewing machine! This is a design by Carina Gardner, you can get this file in the Silhouette Store (Design ID #73533)
Thanks to Carina for the permission to use this design for my blogpost! 
 The key chain on the left side wasn't glued, it was sewn together. And I use it as a bag pendant!
Und nun eines der Designs, die ich so sehr mag - die niedliche kleine Nähmaschine! Diese Datei ist von Carina Gardner, man bekommt sie im Silhouette Store (Design ID #73533)
Vielen Dank an Carina für die Erlaubnis, dieses Design für diesen Blogbeitrag zu nutzen! 
Der Anhänger auf der linken Seite wurde nicht geklebt, sondern zusammengenäht. Und ich nutze ihn als Taschenanhänger! 
KeyChains 42 wesens-art.blogspot.com


KeyChains 43 wesens-art.blogspot.com
KeyChains 44 wesens-art.blogspot.com

Visit and like me on Facebook!


Attention! It is not allowed to copy or use my posts, photos, pattern, templates or files for business or selling!!!
Wichtig! Es ist untersagt, meine Beiträge, Fotos, Schnittmuster, Vorlagen oder Dateien zu kopieren oder gewerblich oder zum Verkauf zu nutzen!!!
I’m sharing my projects with these fabulous linky parties: look here!
...

Sunday, April 17, 2016

DIY Lavender Air Freshener / Lufterfrischer

AirFreshener wesens-art.blogspot.com
Inspired by a blogpost of Jessica I made this Lavender Air Freshener! 
It's easy and a beautiful gift for birthdays, Mother's Day or other occasions! 
This is what I've used: 
 small empty jars 
4 gelatin sheets (ca. 6,7g) 
170 ml boiling water 
170 ml cold water 
1 tsp salt 
36 drops essential lavender oil 
optional: 
food coloring
dried lavender flowers
Inspiriert durch den Blog-Beitrag von Jessica, habe ich diesen Lavendel Lufterfrischer gemacht! 
Es ist einfach und ein schönes Geschenk zum Geburtstag, Muttertag oder andere Gelegenheiten! 
Was ich benutzt habe: 
kleine leere Gläser 
4 Blatt Blattgelatine (ca. 6,7 g) 
170 ml kochendes Wasser 
170 ml kaltes Wasser 
1 TL Salz 
36 Tropfen ätherisches Lavendelöl 
optional: 
Lebensmittelfarbe 
getrocknete Lavendelblüten 
AirFreshener 1 wesens-art.blogspot.com
Add 8 drops of the essential lavender oil and optional a bit of food coloring and a few dried lavender flowers to each jar.  
8 Tropfen ätherisches Lavendelöl und optional Lebensmittelfarbe und einige Lavendelblüten in jedes Glas geben. 
 Boil 170ml water and add the 4 sheets gelatin to it. Stir until it is dissolved and smooth. Then add the salt and the cold water while stirring. Pour this mixture quickl into the jar and stir until it is all mixed. 
 170 ml Wasser aufkochen und die 4 Blatt Gelatine einlegen. Rühren, bis sie gelöst und glatt ist. Dann Salz und das kalte Wasser unter Rühren hinzufügen. Diese Mischung nun schnell in die Gläser füllen und erneut rühren. 
AirFreshener 3 wesens-art.blogspot.com
Let it cool down for a few hours. In the meantime I made this clear stickers to decorate this jars: 
Für ein paar Stunden abkühlen lassen. In der Zwischenzeit habe ich diese durchsichtigen Aufkleber zur Deko gemacht: 
AirFreshener 4 wesens-art.blogspot.com
And this is how the jars looks like: 
Und so sehen die Gläser nun aus: 
AirFreshener 5 wesens-art.blogspot.com
Place a jar with opened lid in your room and the whole room will smell a bit of lavender!
Ein Glas mit geöffnetem Deckel ins Zimmer stellen, und der ganze Raum wird leicht nach Lavendel riechen!
AirFreshener 6 wesens-art.blogspot.com
And if it tip over, it does not run out immediately! 
It is natural, toxin-free, safe for kids & pets 
and it is inexpensive! 
Und wenn es umfällt, dann läuft es nicht gleich aus! 
Es ist natürlich, ungiftig, ungefährlich für Kinder & Tiere 
und es ist günstig!


Visit and like me on Facebook!


Attention! It is not allowed to copy or use my posts, photos, pattern, templates or files for business or selling!!!
Wichtig! Es ist untersagt, meine Beiträge, Fotos, Schnittmuster, Vorlagen oder Dateien zu kopieren oder gewerblich oder zum Verkauf zu nutzen!!!
I’m sharing my projects with these fabulous linky parties: look here!
...

Sunday, April 10, 2016

DIY Box with tear-off strip

TearOffStripBox wesens-art.blogspot.com
A small box with a tear-off strip! 
Really a nice wrapping for sweets or other gifts! 
What you need: 
cardstock 
printer 
cutting knife 
double sided sticky tape or glue 
And if you want to make it as a peek-a-boo-box: 
scissors 
transparent film 
glue stick
Eine kleine Box mit Aufreißstreifen! 
Wirklich eine schöne Verpackung für Süßes oder andere Geschenke! 
 Was man braucht: 
Bastelkarton 
Drucker 
Cuttermesser 
doppelseitiges Klebeband oder Kleber 
Und wenn man es als Peek-A-Boo-Box machen möchte: 
Schere 
durchsichtige Folie 
Klebestift 
TearOffStripBox 01 wesens-art.blogspot.com
 Print this template in the size you need and cut it out.
The black lines are cutting lines, the red lines are fold lines.
(click on the image to enlarge and copy and save)
 Diese Vorlage in der gewünschten Größe ausdrucken und ausschneiden. Die schwarzen Linien sind Schneidelinien, die roten sind Falzlinien.
(zum Vergrößern auf das Bild klicken, kopieren und speichern) 
TearOffStripBox 01b wesens-art.blogspot.com
 Detail image of the tear-off strip:
TearOffStripBox 01c wesens-art.blogspot.com
If you want to make a peek-a-boo box cut a hole in the lid part of the box. Then cut a piece of the transparent film and glue it with the gluestick behind the hole. 
Wenn man eine Peek-A-Boo-Box machen möchte, schneidet man ein Loch in den Deckelteil der Box. Dann ein Stück der durchsichtigen Folie abschneiden und mit dem Klebestift hinter das Loch kleben. 
TearOffStripBox 02 wesens-art.blogspot.com
Now put sticky tape onto the box as shown in the next photos: 
Nun Klebeband anbringen, wie auf den nächsten beiden Bildern zu sehen ist: 
TearOffStripBox 03 wesens-art.blogspot.com
(The stamp with the cat that I've used on the lid, is designed by me (please do not copy) and made with the Silhouette Mint.) 
(Der Stempel mit der Katze ist von entworfen (bitte nicht kopieren) und hergestellt mit der Silhouette Mint.)
TearOffStripBox 04 wesens-art.blogspot.com
Fold the box and fill it as you want, before you close the lid.
Die Box falten und füllen womit man möchte, bevor man den Deckel schließt.  
TearOffStripBox 05 wesens-art.blogspot.com
 Close the lid and it's done! 
Deckel schließen und fertig! 
TearOffStripBox 06 wesens-art.blogspot.com
 Pull the strip to the right to open the box. 
Den Streifen nach rechts ziehen, um die Box zu öffnen. 
TearOffStripBox 07 wesens-art.blogspot.com
TearOffStripBox 08 wesens-art.blogspot.com
The lid holds even without the stripe and you can close the box. 
Deckel hält auch ohne den Streifen, und die Box lässt sich auch schließen. 
TearOffStripBox 09 wesens-art.blogspot.com


Visit and like me on Facebook!


Attention! It is not allowed to copy or use my posts, photos, pattern, templates or files for business or selling!!!
Wichtig! Es ist untersagt, meine Beiträge, Fotos, Schnittmuster, Vorlagen oder Dateien zu kopieren und gewerblich oder zum Verkauf zu nutzen!!!
I’m sharing my projects with these fabulous linky parties: look here!
...

Wednesday, April 6, 2016

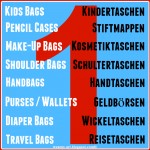
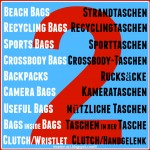
Biggest Free Bag Sewing Patterns Collection / Größte Taschen-Schnittmuster Sammlung

BagPatternsCollection wesens-art.blogspot.com
I have updated the the BIGGEST FREE BAG SEWING PATTERN COLLECTION! 
More than 2400 patterns / tutorials! 
Many new and additonal links added! 
All bags with photo and link to the pattern / tutorial! 
Sorted by categories and updated every week!
GRÖßTE KOSTENLOSE TASCHEN-SCHNITTMUSTER SAMMLUNG, frisch aktualisiert! 
Mehr als 2400 Schnittmuster / Anleitungen!
Viele neue und zusätzliche Links hinzugefügt!  
Alle Taschen mit Foto und Link zu Schnittmuster / Anleitung!
 Sortiert nach Kategorien und wöchentlich aktualisiert

I had to divide this collection because more than 2000 free sewing patterns are too much for one post! 
Ich musste diese Sammlung aufteilen, weil mehr als 2000 kostenlose Schnittmuster zu viel für einen Beitrag sind!


Visit and like me on Facebook!


Attention! It is not allowed to copy or use my posts, photos, pattern, templates or files for business or selling!!!
Wichtig! Es ist untersagt, meine Beiträge, Fotos, Schnittmuster, Vorlagen oder Dateien zu kopieren oder gewerblich oder zum Verkauf zu nutzen!!!
I’m sharing my projects with these fabulous linky parties: look here!
...

Sunday, April 3, 2016

Spring Tile

SpringTile wesens-art.blogspot.com
This is a quick and easy spring decoration! 
You can use it in the house or outside. 
What you need: 
a tile (mine is 25 x 45 cm) 
self adhesive vinyl 
transfertape 
cutting knife 
scissors 
printer 
Dies ist eine schnelle und einfache Frühlingsdekoration! 
Man kann sie im Haus oder draußen nutzen. 
Was man braucht: 
Kachel (meine ist 25 x 45 cm) 
selbstklebende Folie 
Transferfolie 
Cuttermesser 
Schere 
Drucker 
SpringTile 1 wesen-art.blogspot.com
Print this template mirroed on the back side of the self adhesive vinyl. 
(click on the image to enlarge and copy)
 Diese Vorlage gespiegelt auf die Rückseite der selbstklebenden Folie drucken. 
 (auf das Bild zum Vergrößern klicken und speichern)
Cut it out and put the parts onto the tile, by using the transfer tape. 
Ausschneiden und die Teile auf die Kachel kleben, mit Hilfe der Transferfolie. 
SpringTile 2 wesens-art.blogspot.com
And it's done! 
Und es ist fertig! 
SpringTile 3 wesens-art.blogspot.com

Visit and like me on Facebook!


Attention! It is not allowed to copy or use my posts, photos, pattern, templates or files for business or selling!!!
Wichtig! Es ist untersagt, meine Beiträge, Fotos, Schnittmuster, Vorlagen oder Dateien zu kopieren oder gewerblich oder zum Verkauf zu nutzen!!!
I’m sharing my projects with these fabulous linky parties: look here!
...
Related Posts Plugin for WordPress, Blogger...