What can I do with single paper napkins?
Throw them away? No!!!
Let's make some paper napkin flowers!
They are easy to make, even for kids.
What you need:
paper napkin
pencil
brad
scissors
Was kann ich mit einzelnen Servietten machen?
Wegwerfen? Nein!!!
Da machen wir Serviettenblüten raus!
Sie sind einfach herzustellen, auch für Kids.
Was man braucht:
Papierserviette
Bleistift
Bleistift
Briefklammer / Brad
Schere
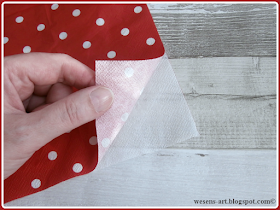
Separate the layers of the paper napkin, we only need one layer.
Die Schichten der Servietten trenne, wir brauchen nur eine Lage.
Fold the napkin four times in a half.
Die Serviette vier mal zur Hälfte falten.
Draw a circle onto the napkin.
Einen Kreis auf die Serviette zeichnen.
Die Mitte markieren und einige Keile aufzeichnen.
Drill a hole in the middle of the circle with the open scissors.
Mit offener Schere ein Loch in die Mitte des Kreises bohren.
Die Briefklammer / Brad in das Loch stecken.
Cut the flower along the lines.
Die Blüte entlang der Linien ausschneiden.
Hold the flower with one hand at the end of the brad.
Use the other hand to lift one layer of the flower after the other.
Die Blüte mit einer Hand am Ende der Birefklammer / Brad halten. Mit der anderen Hand eine Lage nach der anderen hochziehen.
After you have lift all the layers it looks like this:
Nachdem alle Lagen angehoben wurden, sieht es so aus:
Bend the brad and it's done!
Die Briefklammer / Brad aufbiegen und fertig!
You can use this flowers for table decoration, put it onto a gift or wherever you want.
Man kann diese Blüten für die Tischdeko nehmen, auf Geschenke machen, oder was immer man möchte!
Visit and like me on Facebook!

Attention! It is not allowed to copy
or use my posts, photos, pattern, templates or files for business or selling!!!
Wichtig! Es ist untersagt, meine Beiträge, Fotos, Schnittmuster, Vorlagen oder Dateien zu kopieren oder gewerblich oder zum Verkauf zu nutzen!!!
Wichtig! Es ist untersagt, meine Beiträge, Fotos, Schnittmuster, Vorlagen oder Dateien zu kopieren oder gewerblich oder zum Verkauf zu nutzen!!!


Great idea! I love this way of using paper napkins. They come in so many colors, so it could work for anything. Thank you for sharing on Hello Happy.
ReplyDeleteSuper cute idea!!! This would be a great craft for me to do with my nephews!! :-)
ReplyDeleteWhat a fun idea! Thanks for sharing at the "DIY Party" at Pleasures of the NW
ReplyDeleteThese are SO pretty!
ReplyDeleteThanks for joining Cooking and Crafting with J & J!
You're so creative!
ReplyDeleteThank you for joining the party at http://image-in-ing.blogspot.com/2016/05/the-cats-of-san-juan.html
Thanks for the inspiration those flowers are awesome.
ReplyDeleteThis looks like such a fun idea. I love how you can customize the flowers.
ReplyDeleteToo pretty to use, but pretty place setting!
ReplyDeleteToo pretty to use, but pretty place setting!
ReplyDeleteWow. I just love this idea. Thanks for sharing!
ReplyDeleteSuper Cute Idea! Sehr schöne und kreative
ReplyDeleteVielen Dank für die gemeinsame Nutzung auf der #HomeMattersParty Link Party
Love these cute flowers! Thank you for sharing the tutorial with us at Snickerdoodle Sunday! Love them. Pinning to share.
ReplyDeleteWow, those are adorable!! I am going to show my scrapbooking sister this, she would be awesome at it.
ReplyDeleteThanks so much for sharing at #bloggerspotlight!
Super cute and super easy! Thank you for linking up at Funtastic Friday!!
ReplyDelete