Sunday, July 31, 2016

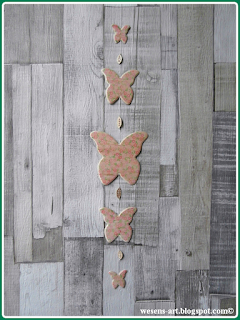
Decorations out of Balsa Wood

BalsaWoodDeco wesens-art.blogspot.com
Did you know that it can be so easy to make beautiful decorations out of balsa wood? 
For the windows, walls, doors, as gifts or quick gift tags! 
What I have used: 
balsa wood (3mm) 
(balsa wood, not plywood!)
Mixed Media metal dies 
die cutting machine 
stamp (my own Silhouette Mint Stamp) 
needle & thread 
Wusstest du, dass es so einfach sein kann, schöne Dekorationen aus Balsaholz zu machen? 
Für die Fenster, Wände, Türen, als Geschenk oder schneller Geschenkanhänger! 
Was ich benutzt habe: 
Balsaholz (3 mm) 
(Balsaholz, kein Sperrholz!) 
Mixed Media Stanzschablonen 
Präge- und Stanzmaschine 
Stempel (meinen Silhouette Mint Stempel) 
Nadel & Faden 
BalsaWoodDeco 01 wesens-art.blogspot.com
Cut out the butterflies and leaves with a die cutting machine. 
(Balsa wood is so soft that you can also cut it with a knife!) 
Schmetterlinge und Blätter mit einer Präge- und Stanzmaschine ausstanzen. 
(Balsaholz ist so weich, dass man es auch mit einem Messer ausschneiden kann!) 
BalsaWoodDeco 02 wesens-art.blogspot.com
Decorate the butterflies (on both sides) with stamps. I used a tiny stamp with colored flowers to give it a vintage look. 
Die Schmetterlinge (auf beiden Seiten) mit Stempeln dekorieren. Ich habe einen winzigen Stempel mit farbigen Blumen genommen, für einen Vintage-Look. 
BalsaWoodDeco 03 wesens-art.blogspot.com
BalsaWoodDeco 04 wesens-art.blogspot.com
Balsa wood is so soft that you can pull the thread with a needle through it! 
Balsaholz ist so weich, dass man den Faden mit einer Nadel durchziehen kann! 
BalsaWoodDeco 05 wesens-art.blogspot.com
BalsaWoodDeco 06 wesens-art.blogspot.com
BalsaWoodDeco 07 wesens-art.blogspot.com

 On a wall: 
An der Wand:
BalsaWoodDeco 08 wesens-art.blogspot.com
In the window: 
Im Fenster:
BalsaWoodDeco 09 wesens-art.blogspot.com
As a gift tag: 
Als Geschenkanhänger: 
BalsaWoodDeco 10 wesens-art.blogspot.com
As flower decoration: 
Als Blumendeko: 
BalsaWoodDeco 11 wesens-art.blogspot.com

Visit and like me on Facebook!


Attention! It is not allowed to copy or use my posts, photos, pattern, templates or files for business or selling!!!
Wichtig! Es ist untersagt, meine Beiträge, Fotos, Schnittmuster, Vorlagen oder Dateien zu kopieren oder gewerblich oder zum Verkauf zu nutzen!!!
I’m sharing my projects with these fabulous linky parties: look here!
...

Sunday, July 24, 2016

Paper Wrapped Pencils

WrappedPens wesens-art.blogspot.com
This time my 5 years old granddaughter shows you how to wrap pencils durable with beautiful wrapping paper! 
What she used: 
pencils 
gift wrapping paper 
scissors 
paint brush 
school glue 
water 
Dieses Mal zeigt meine 5-jährige Enkelin, wie man Stifte dauerhaft mit Geschenkpapier verschönert! 
Was sie nutzte: 
Buntstifte 
Geschenkpapier 
Pinsel 
Bastelleim 
Wasser 
WrappedPens 1 wesens-art.blogspot.com
 Cut the gift wrapping paper in strips. 
Das Geschenkpapier in Streifen schneiden. 
WrappedPens 2 wesens-art.blogspot.com
Mix glue and water (1:1). 
Kleiber und Wasser mischen (1:1). 
WrappedPens 3 wesens-art.blogspot.com
Coat the back side of the strips with the glue / water mixture.
Die Rückseite der Streifen mit dem Kleber- / Wasser-Gemisch besteichen.
WrappedPens 4 wesens-art.blogspot.com
Roll the pencils into the strips. 
Die Stifte in die Streifen rollen. 
WrappedPens 5 wesens-art.blogspot.com

WrappedPens 6 wesens-art.blogspot.com
Now use your fingers to coat the pencils with the mixture and press the paper on. 
Nun mit den Fingern die Mixtur auftragen, um die Stifte zu beschichten. Das Papier anpressen.
WrappedPens 7 wesens-art.blogspot.com
Let the pencils dry. 
Die Stifte trocknen lassen. 
WrappedPens 8 wesens-art.blogspot.com
And it's done! 
Und fertig!
WrappedPens 9 wesens-art.blogspot.com

Visit and like me on Facebook!


Attention! It is not allowed to copy or use my posts, photos, pattern, templates or files for business or selling!!!
Wichtig! Es ist untersagt, meine Beiträge, Fotos, Schnittmuster, Vorlagen oder Dateien zu kopieren oder gewerblich oder zum Verkauf zu nutzen!!!
I’m sharing my projects with these fabulous linky parties: look here!
...

Sunday, July 17, 2016

Heat Transfer Vinyl on Wood

HTVonWood wesens-art.blogspot.com
Did you know that you can apply heat transfer vinyl on wood? 
If you stick vinyl on untreated wood, you will see it doesn't stick for a long time. You have to treat the wood. 
Or: you take heat transfer vinyl (HTV)! 
And there are so many different kinds and designs of HTV! 
Wusstet ihr, dass man Bügelfolie auf Holz aufbringen kann? 
Wenn man Vinylfolie auf unbehandeltes Holz klebt, stellt man schnell fest, dass es nicht lange hält. Man muss das Holz vorbehandeln. 
Oder: man nimmt Bügelfolie! 
Und es gibt so viele verschiedene Arten und Designs als Bügelfolie! 

What I used: 
plywood (untreated) 
HTV in green 
design HTV (Flower-Power) 
ribbon 
2 eyebolts 
scissors 
iron (or heat press)
Teflon sheet (or baking paper) 
Was ich genutzt habe: 
Sperrholz (unbehandelt) 
Bügelfolie Flex in grün 
Design Flex Flower-Power 
Bänder 
2 Ringschrauben 
Schere 
Bügeleisen (oder Transferpresse) 
Teflon-Folie (oder Backpapier) 
HTVonWood 01 wesens-art.blogspot.com
Cut your design out of the design HTV and a bit bigger out of the green HTV (I've used m Silhouette Cameo but you can also cut it by hand).
Das Design aus der Design-Bügelfolie, und etwas größer aus der grünen Bügelfolie ausschneiden (ich hab es mit meinem Silhouette Cameo geschnitten, es geht aber auch per Hand). 
HTVonWood 02 wesens-art.blogspot.com
Place the green HTV on the plywood. 
Cover it with the teflon sheet (or baking paper) and press it on with the iron (pressing, not moving). 
Die grüne Bügelfolie auf das Holz legen. 
Mit Teflonfolie (oder Backpapier) abdecken und mit dem Bügeleisen aufpressen (pressen, nicht bewegen). 
HTVonWood 03 wesens-art.blogspot.com
Remove the transfer film of the HTV. 
Die Trägerfolie von der Bügelfolie entfernen.
HTVonWood 04 wesens-art.blogspot.com
HTVonWood 05 wesens-art.blogspot.com
Place the design HTV onto the green HTV, press it on and remove the transfer tape. 
Die Design-Bügelfolie auf der grünen Folie platzieren, aufpressen und die Trägerfolie abziehen. 
HTVonWood 06 wesens-art.blogspot.com
Screw the eyebolts into the wood. 
Die Ringschrauben in das Holz drehen.
HTVonWood 07 wesens-art.blogspot.com
HTVonWood 08 wesens-art.blogspot.com
Attach the ribbon and the sign is done! 
Bänder anbringen, und das Schild ist fertig!
HTVonWood 09 wesens-art.blogspot.com
HTVonWood 10 wesens-art.blogspot.com
The font I used: Longdon Decorative
Die Schriftart, die ich benutzt habe: Longdon Decorative


Visit and like me on Facebook!


Attention! It is not allowed to copy or use my posts, photos, pattern, templates or files for business or selling!!!
Wichtig! Es ist untersagt, meine Beiträge, Fotos, Schnittmuster, Vorlagen oder Dateien zu kopieren oder gewerblich oder zum Verkauf zu nutzen!!!
I’m sharing my projects with these fabulous linky parties: look here!
...

Sunday, July 10, 2016

DIY Travel Chalkboard

TravelChalkboard wesens-art.blogspot.com
Traveling can be very boring for kids / toddlers. 
Whether in a plane, car, train or hotel - this travel chalkboard can be used everywhere! 
It is easy to make one, and most of the things I've used I had at home. 
What you need: 
piece of oil cloth (an old oilcloth tablecloth) 
old (bamboo) placemat 
chalk cloth (found it at my local fabric store)
bias tape 
zipper 
button 
round elastic cord 
chalk 
Reisen kann für Kids / Kleinkinder so langweilig sein. 
Ob im Flugzeug, Auto, Zug oder Hotel - diese Reise-Tafel kann überall verwendet werden! 
Sie ist leicht herzustellen, und die meisten Dinge, die ich verwendet habe, hatte ich daheim. 
Was man braucht: 
Wachstuch (alte Wachstuch-Tischdecke) 
altes (Bambus-) Tischset 
Tafelstoff (gefunden beim örtlichen Stoffhändler) 
Schrägband 
Reißverschluss 
Knopf
runde Gummikordel 
 Kreide 
TravelChalkboard 01 wesens-art.blogspot.com
At first, we sew a small bag for the chalk: 
take a piece of the olicloth, about 13 x 22cm and a piece of an endless zipper (about 15cm long). Place the zipper to one of the short edges of the oilcloth (right side of the zipper onto right side of the oilcloth) and sew it on.
Zunächst nähen wir eine kleine Tasche für die Kreide: 
ein Stück Wachstuch, etwa 13 x 22 cm und ein ca. 15 cm langes Stück Endlosreißverschluss. Den Reißverschluss auf eine kurze Seite des Wachstuchs legen (rechte Seite des Reißverschlusses auf die rechte Seite des Wachstuchs) und annähen. 
TravelChalkboard 02 wesens-art.blogspot.com
Fold the zipper up and sew again. 
Den Reißverschluss umklappen und wieder nähen. 
TravelChalkboard 03 wesens-art.blogspot.com
Take 2 strips of the bias tape, both about 15 cm long. Fold them half and stitch along the long sides. 
2 Streifen Schrägband nehmen, beide etwa 15 cm lang. Mittig falten und entlang der langen Seiten nähen. 
TravelChalkboard 04 wesens-art.blogspot.com
Place the 2 strips onto the other short side of the oilcloth. 
Die beiden Streifen an die andere kurze Seite des Wachstuchs legen.
TravelChalkboard 05 wesens-art.blogspot.com
Fold the edge of the zipper to the edge with the strips and stitch along the edge. 
Die Kante mit dem Reißverschluss an die Kante mit den Streifen falten und entlang der Kante nähen.
TravelChalkboard 06 wesens-art.blogspot.com
 Open the zipper, fold the zipper up and stitch 
(as shown in the next photo). 
Den Reißverschluss öffnen und wie im nächsten Foto gezeigt, abnähen. 
TravelChalkboard 07 wesens-art.blogspot.com
Fold it together (right side on right side, the strips must be inside) and close the zipper again. 
Zusammenfalten (rechte Seite auf rechte Seite, die Streifen müssen innen sein) und den Reißverschluss wieder schließen. 
TravelChalkboard 08 wesens-art.blogspot.com
Stitch along both sides (the zipper must be half open).  
Then cut the corners.
Entlang der beiden Seiten nähen, der Reißverschluss muss dabei halb geöffnet sein. Dann die Ecken abschneiden.
TravelChalkboard 09 wesens-art.blogspot.com
Turn the bag inside out. 
Die Taschen von innen nach außen wenden.
TravelChalkboard 10 wesens-art.blogspot.com
Now to the chalkboard: 
place the place mat onto the chalk cloth and oilcloth. Cut around the edges, leave about 1cm space at every edge. 
Nun zur Tafel: 
das Tischset auf Tafelstoff und Wachstuch legen. Entlang der Kanten schneiden, mit etwa 1 cm Abstand zu jeder Kante. 
TravelChalkboard 11 wesens-art.blogspot.com
Plug the chalk cloth and the oilcloth together, left side on left side (I used clips because needles would make holes). 
Tafelstoff und Wachstuch aufeinander stecken, linke Seite auf linke Seite (ich habe Clips genommen, weil Nadeln Löcher machen würden). 
TravelChalkboard 12 wesens-art.blogspot.com
Place the strips of the bag centered on one short edge of the cloth. 
Die Streifen der Taschen zentriert an eine der kurzen Kanten legen. 
TravelChalkboard 13 wesens-art.blogspot.com
Stitch on the strips. 
Die Streifen annähen.
TravelChalkboard 14 wesens-art.blogspot.com
Stitch the elastic cord centered onto the edge of the right side only of the oilcloth: 
Die Gummikordel mittig an den Rand der rechten Seite nur des Wachstuchs nähen: 
TravelChalkboard 15 wesens-art.blogspot.com
Sew the bias tape round the edges, leave the side with the cord open. 
Schrägband entlang der Kanten annähen, die Kante mit der Gummikordel offen lassen. 
TravelChalkboard 16 wesens-art.blogspot.com
TravelChalkboard 17 wesens-art.blogspot.com
Plug the place mat into the chalk cloth and oilcloth. 
Das Tischset hinein schieben.
TravelChalkboard 18 wesens-art.blogspot.com
Close the open edge by stitching on the bias tape. 
Die offene Kante durch annähen vom Schrägband schließen. 
TravelChalkboard 19 wesens-art.blogspot.com
Fix the button over the elastic cord. 
Den Knopf über der Gummikordel befestigen.
And it's done! 
Und fertig! 
TravelChalkboard 21 wesens-art.blogspot.com
Roll it together for transport or storing and the chalk is also protected! 
Zum Transportieren oder Lagerung einfach zusammen rollen, und die Kreide ist auch geschützt!
TravelChalkboard 22 wesens-art.blogspot.com


Visit and like me on Facebook!


Attention! It is not allowed to copy or use my posts, photos, pattern, templates or files for business or selling!!!
Wichtig! Es ist untersagt, meine Beiträge, Fotos, Schnittmuster, Vorlagen oder Dateien zu kopieren oder gewerblich oder zum Verkauf zu nutzen!!!
I’m sharing my projects with these fabulous linky parties: look here!
...