Sunday, May 29, 2016

DIY Magic T-Shirt

MagicTShirt wesens-art.blogspot.com
Have you ever heard of UV sensitive fabric ink? 
The effect in the sun is magical! And they are easy to use. 
What I used for the black one: 
black T-Shirt 
 white fabric ink 
piece of a sponge 
templates out of masking film 
UV sensitive fabric inks 
paint brush 
 Habt ihr jemals von UV-sensitiver Stofffarbe gehört? 
Der Effekt in der Sonne ist magisch! Und sie sind einfach zu benutzen. 
Was ich für das schwarze Shirt benutzt habe: 
schwarzes T-Shirt 
weiße Stofffarbe 
ein Stück von einem Schwamm 
Schablone aus Schablonenfolie 
UV-sensitive Stofffarbe 
Pinsel 
MagicTShirt 01 wesens-art.blogspot.com
 And here is my template:
(cut once along the black lines, and once along the red lines) 
Und hier ist meine Schablone: 
(einmal entlang der schwarzen Linien schneiden und einmal entlang der roten)
MagicTShirt 01b wesens-art.blogspot.com
Stick the first template (black lines) onto the shirt and press firmly. 
For protection place a few sheets of paper between the fabric layers.
 Die erste Schablone (schwarze Linien) auf das Shirt kleben und gut andrücken.
Zum Schutz einige Blätter Papier zwische die Stofflagen legen.
MagicTShirt 02 wesens-art.blogspot.com
For a used look I dabbed the white fabric ink with the piece of a sponge unevenly on the template. 
Für einen Used-Look habe ich die weiße Stofffarbe, mit einem Stück vom Schwamm, ungleichmäßig aufgetupft.
MagicTShirt 03 wesens-art.blogspot.com
MagicTShirt 04 wesens-art.blogspot.com
Let it dry. 
Then place the second template onto the first template. 
Trocken lassen. 
Dann die zweite Schablone auf der ersten Schablone platzieren. 
MagicTShirt 05 wesens-art.blogspot.com
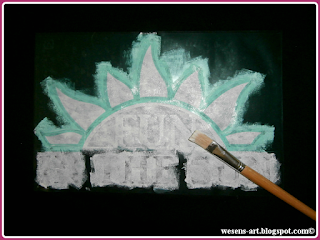
Paint the white parts of the shirt with UV sensitive fabric inks with a paint brush. 
 Die weißen Stellen des Shirts mit UV-sensitiven Stofffarben mit dem Pinsel bemalen.
MagicTShirt 06 wesens-art.blogspot.com
MagicTShirt 07 wesens-art.blogspot.com
Remove the templates and let the T-Shirt dry. 
Die Schablonen entfernen und das T-Shirt trocknen lassen.
MagicTShirt 08 wesens-art.blogspot.com
Turn the T-Shirt inside out and iron it careful. So the ink is fixed and you can wash it as you usually do. And it is done! 
 Das T-Shirt von innen nach außen wenden und vorsichtig bügeln. So ist die Farbe fixiert und man kann es wie gewohnt waschen. Und es ist fertig! 

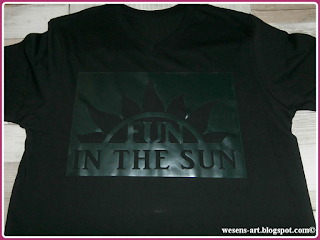
This is how the T-Shirt looks inside the house: 
So sieht das T-Shirt im Haus aus:
MagicTShirt 09 wesens-art.blogspot.com
And outside the house, in the shadow: 
Und draußen, im Schatten: 
MagicTShirt 10 wesens-art.blogspot.com
And finally in the sun: 
Und nun in der Sonne: 
Isn't the effect magically? 
It only takes a few seconds to change the colors!  
Ist der Effekt nicht magisch? 
Es dauert nur einige Sekunden, um die Farben zu ändern! 
MagicTShirt 12 wesens-art.blogspot.com

And now I want to show you the T-Shirt I made for my granddaughter. 
(When you use a white shirt skip the step with the white fabric ink and paint the UV sensitive ink directly onto the T-Shirt.)
Und nun zeige ich noch das T-Shirt, das ich für meine Enkelin gemacht habe.
(Wenn man ein weißes Teil nimmt, dann den Schritt mit der weißen Stofffarbe auslassen und die UV-sensitive Stofffarbe direkt auftragen.)
MagicTShirt 13 wesens-art.blogspot.com

MagicTShirt 14 wesens-art.blogspot.com

MagicTShirt 15 wesens-art.blogspot.com
The butterfly was cut from heat transfer vinyl (HTV holographie rainbow) and pressed on. I use a design out of the Silhouette Store (file by Daniela Angelova: Butterfly Design-ID #90303).
Der Schmetterling wurde aus Flex Bügelfolie (Holographie Flex Rainbow) ausgeschnitten und aufgepresst. Ich habe das Design aus dem Silhouette Store (Design von Daniela Angelova: Butterfly Design-ID #90303).


Visit and like me on Facebook!


Attention! It is not allowed to copy or use my posts, photos, pattern, templates or files for business or selling!!!
Wichtig! Es ist untersagt, meine Beiträge, Fotos, Schnittmuster, Vorlagen oder Dateien zu kopieren oder gewerblich oder zum Verkauf zu nutzen!!!

I’m sharing my projects with these fabulous linky parties: look here!
...

Sunday, May 22, 2016

DIY Butterfly Wineglass Lampshade

ButterflyLampshade wesens-art.blogspot.com
Put a tealight in the belly of the wineglass for mood light with a romantic touch.
For romantic decorations of your table for dinner, shelves or somewhere else.
What you need: 
templates
a wineglass 
a tealight 
paper 
vellum / transparent paper 
scissors / cutting knife 
glue

Man muss nur ein Teelicht in den Bauch des Weinglases setzen, für ein Stimmungslicht mit romantischem Touch. 
Für die romantische Tischdekoration beim Essen, auf Regalen oder wo man sonst mag. 
Was man braucht: 
 Schablonen
ein Weinglas 
ein Teelicht 
Papier 
Transparentpapier stark
Schere / Cuttermesser 
Kleber 
ButterflyLampshade 1 wesens-art.blogspot.com
This templates (only for personal use) are for A4 paper sheets. 
Print and cut it out. 
(Click on the photo to enlarge and copy) 
This templates are for wineglasses with an upper circumference of 19,5cm. Please enlarge or reduce the template if needed.
Diese Vorlagen (nur für den privaten Gebrauch) sind für Din A4 Größe. Ausdrucken und ausschneiden.   
(Auf das Foto zum Vergrößern klicken und speichern)
Diese Vorlagen sind für ein Weinglas mit einem oberen Umfang von 19,5 cm. Bei Bedarf die Vorlage vergrößern oder verkleinern.
ButterflyLampshade a wesens-art.blogspot.com
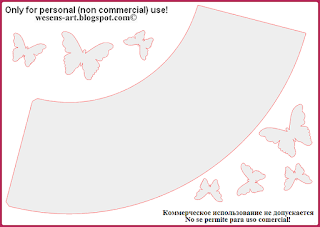
Cut the next image out of vellum / strong transparent paper: 
Die nächste Vorlage aus Transparentpapier stark ausschneiden: 
ButterflyLampshade b wesens-art.blogspot.com
Glue the paper onto the vellum / transparent paper after cutting.
Nach dem Ausschneiden das Papier auf das Transparentpapier kleben. 
ButterflyLampshade 2 wesens-art.blogspot.com
ButterflyLampshade 3 wesens-art.blogspot.com
Glue the bodies of the vellum butterflies onto the lampshade. 
Die Körper der Transparentpapier-Schmetterlinge aufkleben. 
ButterflyLampshade 4 wesens-art.blogspot.com
Glue the right edge onto the left edge.
Die rechte Kante auf die linke Kante kleben. 
ButterflyLampshade 5 wesens-art.blogspot.com
 And it's done! 
Fertig! 


Da meine Dateien mehrfach im deutschsprachigen Raum für gewerbliche Zwecke genutzt wurden (Verkauf der gebastelten Sachen, Verkauf und Weitergabe meiner Dateien, Nutzung für kostenpflichtige Workshops etc.)
gebe ich sie nicht mehr heraus! 
Ich weise hiermit nochmal darauf hin, dass ich keine gewerbliche Nutzung und Weitergabe meiner Dateien gestatte! 
 
Visit and like me on Facebook!
 
Attention! It is not allowed to copy or use my posts, photos, pattern, templates or files for business or selling!!!
Wichtig! Es ist untersagt, meine Beiträge, Fotos, Schnittmuster, Vorlagen oder Dateien zu kopieren oder gewerblich oder zum Verkauf zu nutzen!!!
I’m sharing my projects with these fabulous linky parties: look here!
...

Sunday, May 15, 2016

DIY Kids Ideas for Spring / Summer

IdeasKids wesens-art.blogspot.com
Here are some of my DIY ideas for spring and summer, you can do with or for the kids! 
Hier sind einige meiner DIY Ideen für Frühling und Sommer, die man mit oder für Kids machen kann! 

Sundial wesens-art.blogspot.com

mini scarecrows  wesens-art.blogspot.com
FishingGame wesens-art.blogspot.com

BalloonCover  wesens-art.blogspot.com

ClayPotMonsters  wesens-art.blogspot.com

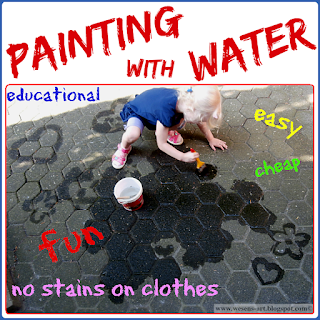
PaintingWater wesens-art.blogspot

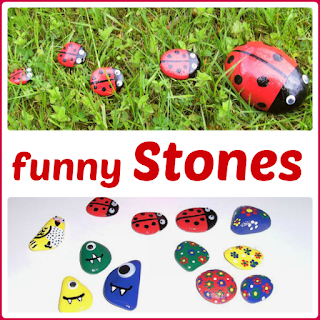
Stones wesens-art.blogspot.com

MonsterBalls wesens-art.blogspot.com

 Have fun in the sun! 
Viel Spaß in der Sonne! 


Visit and like me on Facebook!


Attention! It is not allowed to copy or use my posts, photos, pattern, templates or files for business or selling!!!
Wichtig! Es ist untersagt, meine Beiträge, Fotos, Schnittmuster, Vorlagen oder Dateien zu kopieren oder gewerblich oder zum Verkauf zu nutzen!!!
I’m sharing my projects with these fabulous linky parties: look here!
...

Sunday, May 8, 2016

DIY Paper Napkin Flowers

PaperNapkinFlowers wesens-art.blogspot.com
What can I do with single paper napkins? 
Throw them away? No!!! 
Let's make some paper napkin flowers! 
They are easy to make, even for kids. 
What you need: 
paper napkin 
pencil 
brad 
scissors 
 Was kann ich mit einzelnen Servietten machen? 
Wegwerfen? Nein!!! 
Da machen wir Serviettenblüten raus! 
Sie sind einfach herzustellen, auch für Kids. 
Was man braucht: 
Papierserviette 
Bleistift 
Briefklammer / Brad 
Schere 
Separate the layers of the paper napkin, we only need one layer. 
Die Schichten der Servietten trenne, wir brauchen nur eine Lage. 
PaperNapkinFlowers 02 wesens-art.blogspot.com
 Fold the napkin four times in a half. 
Die Serviette vier mal zur Hälfte falten. 
PaperNapkinFlowers 03 wesens-art.blogspot.com
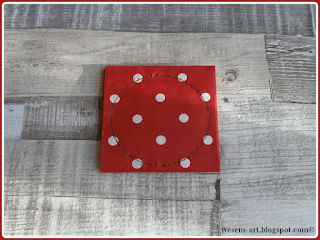
Draw a circle onto the napkin. 
Einen Kreis auf die Serviette zeichnen. 

PaperNapkinFlowers 04 wesens-art.blogspot.com
Mark the middle of the circle and draw some wedges. 
Die Mitte markieren und einige Keile aufzeichnen. 
Drill a hole in the middle of the circle with the open scissors. 
Mit offener Schere ein Loch in die Mitte des Kreises bohren. 

PaperNapkinFlowers 06 wesens-art.blogspot.com
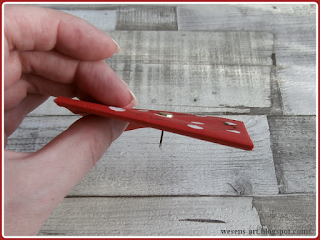
Insert the brad to the hole. 
Die Briefklammer / Brad in das Loch stecken. 
PaperNapkinFlowers 07 wesens-art.blogspot.com
PaperNapkinFlowers 08 wesens-art.blogspot.com

Cut the flower along the lines. 
Die Blüte entlang der Linien ausschneiden.
PaperNapkinFlowers 09 wesens-art.blogspot.com
PaperNapkinFlowers 10 wesens-art.blogspot.com
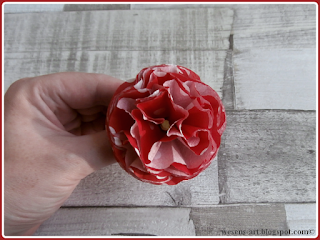
Hold the flower with one hand at the end of the brad. 
Use the other hand to lift one layer of the flower after the other. 
Die Blüte mit einer Hand am Ende der Birefklammer / Brad halten. Mit der anderen Hand eine Lage nach der anderen hochziehen. 
PaperNapkinFlowers 11 wesens-art.blogspot.com
After you have lift all the layers it looks like this:
Nachdem alle Lagen angehoben wurden, sieht es so aus:
PaperNapkinFlowers 12 wesens-art.blogspot.com
Bend the brad and it's done! 
Die Briefklammer / Brad aufbiegen und fertig! 
PaperNapkinFlowers 13 wesens-art.blogspot.com
PaperNapkinFlowers 14 wesens-art.blogspot.com
You can use this flowers for table decoration, put it onto a gift or wherever you want.
Man kann diese Blüten für die Tischdeko nehmen, auf Geschenke machen, oder was immer man möchte!
PaperNapkinFlowers 15 wesens-art.blogspot.com
 PaperNapkinFlowers 16 wesens-art.blogspot.com


Visit and like me on Facebook!


Attention! It is not allowed to copy or use my posts, photos, pattern, templates or files for business or selling!!!
Wichtig! Es ist untersagt, meine Beiträge, Fotos, Schnittmuster, Vorlagen oder Dateien zu kopieren oder gewerblich oder zum Verkauf zu nutzen!!!
I’m sharing my projects with these fabulous linky parties: look here!
...
Related Posts Plugin for WordPress, Blogger...